Showing posts with label cooking. Show all posts

May 9, 2022

Easy Faux Boston Cream Pie (including a Ganache Recipe)

This post contains affiliate links that help support this site at no additional cost to you. Thank you for using them! You can read CFO's full disclosure here.

I wanted an easy dessert to take to dinner at my in-laws' house for Mother's Day yesterday, and I spotted Ina Garten's Boston Cream Pie recipe on my Pinterest Desserts board. But I didn't feel like making pastry cream or even a new cake recipe, so I improvised an easier pseudo-Boston Cream Pie.

I started with my favorite yellow cake recipe from Michelle Lopez's excellent book, Weeknight Baking, which I baked in two 8-inch round cake pans.

I whipped up a package of organic Vanilla Instant Pudding using whole milk to use as the cake filling. It's nowhere near as pretty as a good pastry cream, and actually not as delicious either. But it's still pretty darn good. 

And then I made the chocolate ganache (recipe below). Nothing was difficult, and you could even use a yellow cake mix if you didn't want to make a cake from scratch. The hardest part was the assembly, and that was mostly because I didn't let the ganache cool quite enough so it was a little too thin when I poured it on. (My kitchen was pretty warm, so trust your senses rather than the time.)

Here's a step-by-step process for clarity:

Easy Faux Boston Cream Pie
Serves 8-12

1. Make your favorite yellow cake in two 8 or 9-inch round cake pans. Bake according to directions and let cool completely.

2. Make a package of instant vanilla pudding. Use whole milk for the best consistency and let chill for at least one hour.

3. Make a simple syrup: In a small saucepan, combine 1/4 cup granulated sugar and 1/4 cup cold water. Bring to a boil, and stir until the sugar is dissolved. Simmer on very low heat for 15 minutes to reduce the amount of liquid. Let cool. (Note: Simple syrup is just a 1:1 ratio of sugar and water, so you could easily make more and save the extra to sweeten iced tea or coffee.)

4. Approximately two hours before serving time, make the ganache (recipe follows). Let cool for 20-40 minutes, until the mixture is slightly thickened and falls in ribbons.

5. To assemble the cake, use a long serrated knife to split each cake round in two to create four layers. Place one cake layer on a cake stand or serving platter, cut side up. Use a pastry brush to lightly coat the cake with simple syrup. Spread one-third of the vanilla pudding over the cake. Repeat with two additional cake layers. Place the final cake layer on top of the last layer of vanilla pudding cut side down. Slowly pour the ganache over the cake, allowing the chocolate to drip down the sides. If you made an 8-inch cake, you will have enough ganache to fully cover the sides if you wish (though you might need to use an offset spatula to push the ganache off the top in some directions). Let the chocolate set at room temperature for an hour before serving. 

Store leftovers in the fridge. Since my cake stand didn't come with a cover, I use a large mixing bowl turned upside down to cover my cakes. (Plastic wrap would stick to the chocolate and ruin the look but would work also.)

Chocolate Ganache
Makes enough to cover one 8 or 9-inch layer cake
Adapted from Ina Garten's Boston Cream Pie recipe

3/4 cup heavy cream
7 1/2 ounces semisweet chocolate*
2 ounces bittersweet chocolate*
2 tablespoons of corn syrup
1 teaspoon vanilla extract
1/8 teaspoon kosher salt
1/4 to 1/2 teaspoon instant coffee granules optional**

Combine all ingredients in a double boiler, or a medium heatproof bowl set over a small pot of simmering water. Once the chocolate starts to melt, stir until the chocolate is half-melted. Remove the bowl from heat and stir until all of the chocolate is melted and the ingredients have combined into a smooth mixture. Set aside and stir occasionally until it cools enough to thicken slightly and falls in ribbons.

*I really like Guittard chocolate. I always have their chips and wafers on hand - they are high-quality and free from peanuts, tree nuts, and gluten. Best of all, their chocolate is fair-trade certified, which is no small thing - according to the U.S. government, over 1.5 million children work in dangerous conditions on cocoa farms in Côte d’Ivoire and Ghana. And Guittard chips are widely available, including at Target!

**If you don't want to taste any coffee in the ganache, use a scant 1/4 teaspoon. Use the full 1/2 teaspoon if you don't mind a hint of coffee.

Apr 9, 2020

Tips to Make Feeding Your Family Easier

We're into our fourth week of quarantining at home, which means I've been cooking a lot, not just for us but for my in-laws as well.

Of course, we've been lucky. I always have a lot of food on hand, and I was able to get one delivery order and one pickup order at Ralphs (our Kroger affiliate) in the last couple of weeks. I also had a ButcherBox of meat delivered (unfortunately, they're not taking new customers right now), and I've been able to have fresh fish delivered from the vendors at the farmers markets I used to go to.

Tips to Make Feeding Your Family Easier
But as much as I love cooking, and as many ingredients as I have available to me, it's not exactly easy cooking multiple meals every day. From talking with my friends, I know I'm not the only one feeling this way. We all make things a little easier on ourselves by ordering out and supporting our local restaurants and restaurant workers at least sometimes. I've even gotten a chain letter-type email for new recipes.

So here are some ideas to make feeding your family easier:

Use a recipe generator - If you search for "recipe generator ingredients," you'll get results for sites and apps where you can input the ingredients you have on hand and get recipe suggestions using those ingredients.

Swap meals with friends and family - You can each make a double batch (or more) of a dish, then do a contact-less trade. When my brother-in-law and I traded groceries the other day, he left a bag on his porch, and I grabbed it and left behind a bag of items for him. You can do the same with meals in foil pans. (Yes, it's safe to share food with others as long as you're not sick.)

Plan for nextovers - It's not quite the same as "cook once, eat twice," but cooking extra with a plan for using the leftovers in a new meal can save time and effort (not to mention your sanity). Plus you don't feel like you're eating the same thing over and over. Here are some nextover ideas I shared last year.

Experiment - I hate laboring over meals that my family then doesn't enjoy, but there's no better way to learn if something is worth making and eating than actually making and eating it. If you have the ingredients for a recipe that you've been on the fence about making, maybe now's the time.

Make comfort foods - The opposite of a truth is often true, which is why I think this is a great time to also make comfort foods, especially the time-consuming kind (in my case, something like lasagna).

Order take out or delivery - I mentioned this above, but it's worth mentioning again. If you can afford it, this is a great way to give yourself a break, mix things up, and support local businesses and workers who are likely struggling right now. (Not necessarily local or applicable for meals, but here's a Google Sheet listing food-oriented small businesses throughout the country who offer shipping. I ordered some cheese from California's Point Reyes Farmstead Cheese Co.)

Finally, here are some recipes I've made recently that you and your family might enjoy (links are to Pinterest, so you can save them to your boards, which is how I manage recipes these days):

Jan 23, 2020

Eating More Vegetables is Hard + Tips to Eat More Veggies

As I've mentioned a few times, I've been doing the Whole30 this month. It's meant a lot of changes to what I eat, but the most challenging change has been eating more vegetables. For one thing, I'm not a huge salad eater, at least if I'm the one making them, especially in the winter. (I know 50-60 degrees isn't cold to a lot of people, but it's cold to me!)

So I'm cooking a lot of vegetables, which has meant a lot of additional cooking. In fact, this Kitchn writer agrees with me that it's hard to cook and eat two vegetables at every meal, which she did when she spent a week eating like Queen Elizabeth. It also took me almost two weeks to realize that I had to buy way more veggies than I was used to!

Tips for Eating More Vegetables


But I'm figuring things out. Three weeks into the Whole30, I have some tips on how to make eating more vegetables easier:

Buy more veggies than you think you need. This tip is especially relevant if you're replacing other foods (like rice or bread) with veggies, because you should ...

Prep and cook in bulk and/or batches. If you've bought a ton of vegetables as recommended above, the best way to make sure you eat them is to prep and cook in bulk or in batches. For example, if you bought six heads of broccoli, break them all down into florets and cook them at once. They'll be good for days, and you won't feel like you're doing the same task over and over again, the way you would if you cut and cooked them one head at a time. If you don't have a pan that will fit that much broccoli, cook it in batches, or steam half and roast the other half. If you've bought the components for a salad, do all of your washing and chopping at once, and make a bunch of meal prep salads.

Experiment with different techniques, spices, and sauces. My kids think carrot sticks are okay, but they've been devouring roasted carrots for the last week. And lately, I've been putting balsamic glaze on roasted Brussels sprouts, and Aleppo or cayenne pepper on steamed veggies.

Know your favorites. It's great to try new vegetables, especially because you don't want to get sick of your favorites. But be sure to keep some of your favorites on hand, because if you hate jicama (which I did), at least you'll still have broccoli (which I also did).

Have some easy go-to vegetables. This way, when you don't feel like doing much chopping and cooking, you can still get veggies on the table. For me, it's spinach and sweet potatoes: I can sauteé the spinach and microwave a sweet potato to get two vegetables on my plate at any meal.

How do you make sure you're eating your veggies?

Jan 16, 2020

Kitchen Tip: Make Baking Easier by Leaving Measuring Cups in theContainers

Nearly two years ago, the Happier with Gretchen Rubin podcast suggested keeping measuring cups in containers holding items that regularly need to be measured. It was a total AHA! moment for me. I think I might have put measuring cups in my flour and sugar containers that day, and I've kept them there ever since.

In fact, in my flour container, I keep two measuring cups - a half cup measure and a quarter cup measure - along with one wooden chopstick. Depending on how much flour I need, I use one cup to spoon flour into the other, and the chopstick to level the top.


I've also been known to leave measuring cups in my cocoa, sucanat, and brown sugar containers. This tip has saved me from so much dish washing!

Leave measuring cups in the cocoa, sucanat and brown sugar

P.S. I love the OXO Pop containers - they're light, which is important when the items they're holding are heavy, and clear, which means you can see what's inside and how much is left. The large containers hold about four pounds of flour or sugar. I think you can get a whole five-pound bag in there, but the top of the ingredient would be so close to the top of the container that it would be difficult to measure. The container with brown sugar is the Progressive Brown Sugar Keeper, which has a terracotta disc that retains some moisture - it's not perfect, but it does pretty well. (As an Amazon Associate I earn from qualifying purchases, so thank you if you use those links!)

Kitchen Tip: Make Baking Easier by Leaving Measuring Cups in the Containers

Dec 19, 2019

Prepping my Kitchen for a Vacation

We're going to be out of town soon, and I've been thinking about how to make things easier for when we get home.

I always try to clean the house before we go on vacation - that just means cleaning the bathrooms, vacuuming, mopping, wiping down counters, and putting away obvious clutter. It just feels good to come home to a clean house. It also gives me a little breathing space before I have to get back into the swing of things.

This time, I also want to be ready with food, so I don't have to rush out and go marketing as soon as we get home. Partly it's because I've been shopping so much at the farmer's markets, and there won't be one open right after we get home. It's also partly because I'll be doing the Whole30 in January and I want to make things as easy as possible for myself on that front.

Prepping my Kitchen for a Vacation


I've come across a few different strategies people use:

Order groceries and have them delivered when you arrive home. This way, you don't have to run out to the store the way I usually do. However, I don't love this idea because I like picking out my own meat and produce. But I might give it a try.

Freeze some meals. This is a strategy I love, although I'm not sure I have the time to figure out some Whole30-friendly freezer meals and make them. Lasagna, chili, enchiladas, spaghetti sauce, and meatloaf all freeze well. Here's how I turned five pounds of ground turkey into six freezer meals. I also usually have the ingredients for fried rice in the freezer (leftover rice, leftover meat, and frozen veggies). The Family Freezer has some Instant Pot freezer meals, which seem particularly convenient for someone just walking in the door after a vacation, since you can cook a whole meal in a short time with minimal effort.

Stash some long-lasting items in the fridge. I'm going to put some apples, oranges, carrots, ultra-pasteurized milk, eggs, and yogurt in the fridge before we go. These are all items that should keep for a over a week, and will hold us over for a few days until I'm ready to go marketing. One word of caution: don't store too much in the fridge, since there's always the possibility you might come home to spoiled food if the power goes out while you're gone.

Prep for some pantry meals. Pasta Puttanesca and Sardines with Rice don't require anything perishable.

Of course, if things don't work out, it's helpful to have your favorite delivery place programmed into your phone!

Do you have any pre-vacation must-do's that make your return easier?

Nov 18, 2019

Nextover Ideas

I love the idea of "nextovers," which involves transforming leftovers into a new meal. It's a great way to use leftovers without feeling like you're eating the same thing over and over, and it's also a great way to "cook once, eat twice." Here are some of my favorite nextover ideas:

Taco Meat → Enchiladas
See my Freezer Meal Enchildadas to see how I transform leftover taco meat into enchiladas. I've done this with ground beef, ground turkey, and shredded chicken.

Salmon → Salmon Cakes
I roast salmon fillets at least once a week, and then freeze the leftovers. You can use this recipe for Salmon Patties as a starting point, if you don't already have one. Another favorite nextover is salmon korokke (Japanese croquettes), but I find the breading and frying too much work to do this often.

Roast Beef → Beef Hash or Pot Pie
This Serious Eats Roast Beef Hash recipe is a favorite around here. I don't have a favorite pot pie recipe, because I just make a roux-based white sauce, add meat and veggies, top with puff pastry or biscuits, and bake until the topping is done.

Roasted Veggies → Frittata
Use my Bacon & Zucchini Frittata or Potato & Broccoli Spanish Tortilla recipes as a starting point.

Any Meat → Fried Rice
I make fried rice once a week, using leftover roast beef, salmon, kalua pork, or sometimes even Spam. (Yes, that's a nod to my Hawaii roots.) I use soy sauce and sriracha to taste for seasonings (along with a decent amount of avocado oil and sesame oil), but if you'd like a recipe, try this Chicken Fried Rice, and use whatever veggies you have on hand.

What are your favorite nextovers?

Nextover Ideas from Chief Family Officer

Nov 20, 2018

Recipes for Thanksgiving

You might have all of your Thanksgiving recipes lined up already, but in case you're still on the hunt for something new this year, be sure to check out our Thanksgiving Pinterest board, which is full of recipes, as well as some cute crafts, ideas for using leftovers, and more!

Recipes for Thanksgiving 2018

We're going to my brother-in-law's on Thursday, but I'm not expecting to come home with leftovers, so I'm planning to cook what is pretty a much a full Thanksgiving meal anyway. Here's what I've got planned:

Garlic Herb Slow Cooker Turkey Breast with Garlic Butter Gravy - I've never made a turkey breast before, but I got one at Whole Foods yesterday. I'm happy I can do all the cooking in the slow cooker, which frees up my oven.

Super Simple Make Ahead Instant Pot Orange Cranberry Sauce - The recipe says this keeps in the fridge for up to two weeks, so I might even make this today!

Streuseled Sweet Potato Casserole - I've made this every Thanksgiving since the recipe was published in 2002 (not a typo!). I'm actually planning to make two casseroles - one to take to my brother-in-law's, and one for us to have at home.

Green Beans Gremolata - This one is a maybe, but it sounds really good.

5-Ingredient Mini Pumpkin Pies - I'm the only one who likes pumpkin pie even a little bit, but Thanksgiving just doesn't seem like Thanksgiving without it. I thought if they were minis, my family might be tempted.

And I have a box of Mrs. Cubbison's stuffing mix - I've yet to make a homemade stuffing I really like, so I'm going the easy way on this since I'm doing a lot of other cooking.

I'm also going to make Grandma's Green Bean Casserole to take to my brother-in-law's. I made it for the first time last year, and everyone liked it so I'm making it again this year. I'll use frozen haricot verts from Trader Joe's instead of canned green beans, and I'm going to mix in some shredded double cream gouda with the cheddar cheese this time.

I'll try to remember to post pictures on Instagram with quick reviews, since these are mostly new-to-me recipes. Happy cooking!

Sep 20, 2018

A Week of School Lunches

One of the big adjustments I have to make at the start of every school year is packing lunch for my kids. They don't want to buy the school lunch for a variety reasons, including the taste (or lack thereof), the long lines, and one of the boys' various food allergies. I don't mind packing their lunches, so I haven't been driven to teach them to do it themselves, although that sounds nice in the abstract. Also, we leave the house before 7 a.m. so they can catch the bus, and I don't want to make the mornings even more rushed than they already are.

Having said all that, I thought I'd share what a week of school lunches looks like around here, as well as my philosophy. (There's only four lunches here, because we've had four consecutive four-day weeks!) I'm always on the lookout for new lunch ideas, and I hope these will help some of you.

Ideally, every meal would be healthy and perfectly balanced, but the reality is that: 1) my kids hate school so a lunch of things they like makes their days a little better; 2) they'll eat fruit but veggies are a different story; and 3) they'll make up a lot of fruit, protein and calcium at dinner. So I try to pack relatively wholesome foods but also try to make sure there's a good amount of food I know they'll eat even if they don't like part of the meal. I realized my philosophy lines up pretty well with Andrea Dekker's "fun and easy school lunches" - like her, I'm okay with the food sometimes being processed and not the healthiest, because they eat it and usually enjoy it. And they get wholesome meals when they eat at home.

Here's what a recent week looked like:

Day 1:

Day 1 Lunch

Day 1 Lunch
my 13-year-old's lunch
Day 1 Lunch
my 11-year-old's lunch

- Ham & Cheese Muffins, which were a little bland. Next time, I'll add a little mustard to the wet ingredients, and use seasoned salt to up the flavor.
- some slices of pepperoni and half a string cheese (pre-shredding it for the boy who doesn't like string cheese worked and now he eats string cheese!)
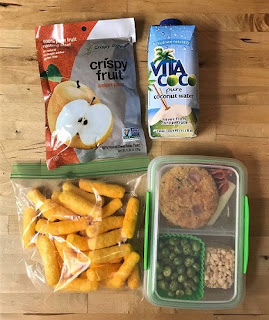
- freeze-dried strawberries from Trader Joe's for one boy and roasted dried peas for the other (normally I'd pack fresh fruit like grapes or apple slices, but it was the first day of the week and I hadn't been to the market yet)
- pouches of freeze-dried pears (I love this brand) and some cheese puffs from Trader Joe's
- a fruit punch box for one boy and a coconut water for the other; both boys also have a reusable water bottle with ice water
Verdict: Neither boy ate his muffin. One took a bite, so I'm guessing he didn't like the flavors and I can't blame him!

Day 2:

Day 2 Lunch

Day 2 Lunch

- Homemade Lunchables with turkey, pepperoni and cheese, crackers, strawberries, a Trader Joe's S'mores cube, and 3 Trader Joe's Dark Chocolate Coins (you might notice the boxes are not exactly alike, because my children have their individual preferences)
- More freeze-dried pears and cheese puffs from Trader Joe's, and another fruit punch box for one boy and coconut water for the other
- I tend to overpack a little bit because I'm never quite sure what the boys will eat, or if it's one of those days when they're particularly ravenous; my priority is just to make sure they get enough calories that they have the energy to get through the whole school day
- Verdict: They both ate well!

Day 3:

Day 3 lunch

Day 3 lunch

- Turkey and pepperoni rollups with string cheese (using the same cold cuts left over from the previous day's lunches) with grapes and a rice krispie treat from the freezer
- Trader Joe's cheese puffs and Annie's fruit snacks
- An apple juice box for one boy and coconut water for the other
Verdict: This was the hit of the week - one lunch box came back completely empty, and the other had only a couple of grapes and the fruit snacks!

Day 4:

Day 4 lunch

Day 4 lunch

- Chocolate chip banana bread mini loaf from the freezer, with grapes and a rice krispie treat (also from the freezer)
- Japanese "potato sticks" packets and Annie's fruit snacks
- A fruit punch box for one boy and coconut water for the other
Verdict: Mixed results. I think maybe one boy wasn't particularly hungry, or maybe he just doesn't like my banana bread anymore!

A few more notes:

The plastic containers I use are the Sistema Small Split containers that I got in-store at Target. I have two of each color, and my older son always gets the green one and my younger son always gets the blue one. Since I pack similar but different lunches, the different colors makes it easy to quickly differentiate which container goes with which kid.

Having some baked goods in the freezer is a life saver when it comes to packing lunches. I bake all kinds of mini loaves in this mini loaf pan, which I picked up at Target. I'd been hoping that the ham and cheese muffins would be a convenient addition to my freezer stash, but I have to work on tweaking the recipe first.

A Week of School Lunches | Chief Family Officer


A Week of School Lunches | Chief Family Officer

May 4, 2018

Slow Cooker Freezer Meal: Kalua Pork

I'm all about freezer meals these days. Here's an easy recipe for Slow Cooker Freezer Friendly Kalua Pork! See the rest of our Freezer Meals series here.

Roasts for Kalua Pork

Last week, Ralphs had a 4-day sale that included pork shoulder for just $0.99 per pound. I prefer to buy the Simple Truth brand at Ralphs or from the meat counter at Whole Foods, but I just couldn't pass up the price! I bought two roasts that were around four pounds each, and turned them into Kalua Pork freezer meals. (This Kalua Pork was one of the very first recipes published here at CFO, way back in 2005!)

Traditionally in Hawaii, Kalua Pork comes from a whole pig roasted in a pit on the beach. My version is a lot easier for the home cook, and extremely versatile.

Once the pork is cooked, you can shred it and mix in some Mexican seasonings to make carnitas. I like to cool and dice leftovers, and make a hash with it, riffing off this recipe.

Kalua Pork is salty, and I use Ono brand Hawaiian seasoned salt (pictured below), which is available at Amazon. You can substitute kosher salt, but use 2 tablespoons since the grains are smaller, and add a teaspoon each of granulated garlic and onion for some extra flavor. Also, you can add liquid smoke for that authentic smokiness, but I avoid it since it's carcinogenic and the pork comes out delicious without it.

Ono Hawaiian Salt

Slower Cooker Freezer-Friendly Kalua Pork

4lb pork shoulder (butt) roast
3 tablespoons seasoned Hawaiian salt
non-stick cooking spray

To freeze:

1. Pour the salt into a ziptop freezer bag.

2. Score the top and bottom of the roast in a one-inch criss-cross pattern to allow the salt to absorb better. (Helpful picture here.)

3. Add the roast to the ziptop bag and rotate it, massaging the salt into the roast for a few seconds. Label and date the bag and freeze.

To cook the roast:

1. Defrost the roast overnight in the refrigerator.

2. Spray the inside of the slow cooker crock with non-stick cooking spray (for easier clean up) and set to low.

3. Transfer the roast to the crock, fat side down. If a lot of the salt is left behind in the bag, pour it onto the roast. Cook on low for 8 to 10 hours.

If you want a semi-traditional Hawaiian meal, shred the pork and serve it over steamed rice, preferably with macaroni salad. Easy and delicious! I like to sautee some thinly sliced cabbage in butter, toss it with the shredded pork, and serve it over rice, like so:

Slow Cooker Freezer Friendly Kalua Pork

Remember, leftovers freeze well too!

Slow Cooker Freezer-Friendly Kalua Pork

Freezer Friendly Slow Cooker Kalua Pork

Mar 29, 2018

Freezer Cooking Example: Ground Turkey

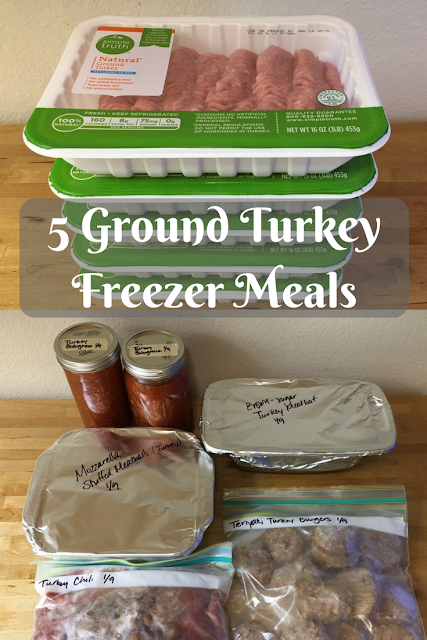
Back in January, Ralphs had their Simple Truth brand of ground turkey on sale for $2.99 per pound, so I picked up five one-pound packages. I brought them home and turned them into the following freezer meals:

Turning 5 pounds of ground turkey into 5 freezer meals | Chief Family Officer

Slow Cooker Turkey Chili

When I make a turkey chili freezer meal, I start with this New Leaf Wellness Turkey Black Bean Chili recipe. But I don't like black beans in chili, so I substitute cans of rinsed kidney and pinto beans. I also leave out the corn, because it's not my family's favorite.

To freeze the chili, I put the liquid ingredients (tomatoes and sauce) in the bottom of a freezer ziptop bag, then the beans and spices, and finally the ground turkey. I use two freezer bags, and label and date the outside bag. Prepping the meal in a bag makes freezing it really easy, because you just have to lay the bag flat in the freezer.

To cook the chili, I pull the bag out of the freezer and let it sit in the fridge overnight. The next day, I dump the contents of the bag into my slow cooker and set it for low all day.

Brown Sugar Turkey Meatloaf

This is another adaptation of a New Leaf Wellness recipe. I substitute turkey for the ground beef, and actually mix the sugar-ketchup sauce mixture into the meat mixture. It makes the meatloaf super moist, and it's delicious.

When freezing a meatloaf, I usually just use a glass loaf pan, and cover it with a layer of plastic wrap and a layer of foil (as depicted below). I use a Sharpie to write the contents and date directly on the foil. You could use a foil loaf pan if you don't want to tie up a glass loaf pan in the freezer.

To bake the meatloaf, I defrost it overnight, then bake it the next day. I put the cold pan into the oven when I turn the oven on, instead of preheating it, to avoid shocking the glass. No guarantees, but it's worked for me so far.

Teriyaki Turkey Burgers

I completely improvised this recipe, adding onion powder, grated ginger, brown sugar, mirin and soy sauce to the ground turkey. My family actually really liked these burgers, so I'll have to make them again and record measurements.

You could defrost and pan fry the burgers, but I opted for the easy route and cooked the burgers in the oven from frozen. I just put them on a Silpat and baked them until they were done.

5 Freezer Meals | Chief Family Officer

Instant Pot Turkey Bolognese

I've adapted my favorite bolognese recipe for the Instant Pot, which I love because of the saute function. I skipped the carrots and celery, used the saute function to brown the ground turkey before adding rest of the ingredients and cooking it on the Stew function for a few hours.

Once the sauce was done, I ladled it into mason jars, then labeled the lids with masking tape and a Sharpie. I really like the straight sided mason jars for freezing liquids - even if the center is still frozen, I can slide it out. The core doesn't get stuck the way it sometimes does in the more traditionally shaped mason jars.

Turkey Pesto Meatballs

I mostly followed this New Leaf Wellness recipe, but skipped the tomato sauce because my boys don't like tomato sauce except in baked pasta. These were a hit with my oldest, who liked them way more than the chicken meatballs I made a couple of months earlier.

What are your favorite freezer meals? Plus see the rest of this freezer meal series here.

5 Ground Turkey Freezer Meals | Chief Family Officer


This post contains affiliate links that help support this site at no additional cost to you. Thank you for using them! You can read CFO's full disclosure here.

Feb 15, 2018

New Favorite Kitchen Appliance: NutriBullet Blender

One of the books I've been reading off and on is How to Live a Good Life by Jonathan Fields. He talks about the three buckets of life, the first being the Vitality Bucket. One of his suggestions is to have a daily green smoothie, and he recommends the site Simple Green Smoothies.

CFO Favorites: NutriBullet Blender

I've actually known about SGS for several years, and regularly used their formula to make smoothies in my Vitamix. My favorite combination is spinach, water, a banana, and whatever fruit I have in the freezer. Reading How to Live a Good Life made me decide to commit to a daily green smoothie.

The thing about my Vitamix, though, is that it's huge - the jar holds 64 ounces, or 8 cups! And it was difficult to blend up smaller portions in that large jar. Vitamix does make smaller containers, but they're all rather expensive.

So I got a NutriBullet, which came with 3 cups and 2 blades - all for less than the cost of one Vitamix jar. It's been great, because it's so easy to blend up one or two servings at a time. I have a green smoothie almost every day now, because of the ease and convenience (which are great strategies for creating a new habit, according to Gretchen Rubin, who literally wrote the book on happiness and habits).


The NutriBullet does a fantastic job of making a smooth smoothie - I follow the SGS technique of blending the greens with liquid first, and I never get lumps. The only thing it doesn't blend perfectly is berry seeds, so I avoid strawberries and raspberries when I use it because I really dislike the grittiness. (This isn't a problem with the Vitamix.) I've been adding chia seeds to my smoothies lately, and those get blended up completely. (I do soak them first, which undoubtedly helps.)

I love my NutriBullet so much that the next time I visit my parents, I'm going to order one for the their place and teach them how to make a daily green smoothie!

This post contains affiliate links that help support this site at no additional cost to you. Thank you for clicking through them! You can read CFO's full disclosure here.

Feb 9, 2018

What Meals Freeze Well?

One of the best things about freezer meals is that you don't need to learn any new recipes - many of your family favorites will freeze well. This means you'll be able to eat them more often, and with less time spent in the kitchen!

What Meals Freeze Well?

In general, casseroles, soup, stews, and meat freeze well. This includes meals like lasagna or any baked pasta - one of the first freezer meals I learned to make was these Cooking Light stuffed shells. Pasta sauce also freezes well, like my favorite bolognese recipe.

A super easy way to make a freezer meal is to put a roast in a zip-top bag (don't forget to label it!), top with your usual seasonings (salt, pepper, garlic, chopped onion or onion powder, etc.), and then freeze. When you want to cook the roast, defrost the contents, dump them into a slow cooker, add your favorite cooking liquid, and cook until tender. For example, I've done this with my Soy Onion Shredded Beef recipe - I put everything but the water in a gallon-size zip-top bag and freeze until I'm ready to cook it. Add a salad or roasted vegetable for a complete meal.

I know it's not a revelation, but uncooked meat freezes very well. You can just toss the meat into the freezer for later, but you'll definitely thank yourself if you turn that ground beef into meatloaf or burgers first. For freezer meal purposes, it's best to do something to the meat speed up your cooking process, whether it's dicing chicken thighs for soup or cutting chicken breast into nuggets. Getting that one step done before freezing the meat can be the difference between "That's too much work so I don't feel like cooking tonight" and "All right, that won't take very long." (Why yes, that is the voice of experience.)

Many frugal cooks like to brown their ground meat and freeze it in one-pound portions so it's ready to go for tacos, etc. but I personally prefer not to do this because I don't like the texture of the defrosted cooked meat unless I have a specific purpose for it, where the texture isn't going to bother me, like in enchiladas. So I do keep one or two pounds of packaged ground beef in the freezer.

As mentioned already, soups and stews freeze well, but if you're freezing the prepped ingredients rather than a cooked soup or stew, I recommend leaving out the liquid (chicken stock, water, etc.) just to save space in the freezer. For example, if you're prepping Crockpot Taco Soup, leave out the beef broth when freezing and add it to the slow cooker on cooking day.

Meals that are mostly dairy don't freeze well because the dairy can separate and change the texture of the meal. But if you have a meal that has dairy added at the end, freeze everything else, and then add the dairy before you serve it.

Casseroles usually freeze great, although I usually throw them together on the day I'm serving them, using whatever I cobble together from the freezer. That's the beauty of freezer cooking - it's infinitely adaptable to how you like to do things, but as long as you use what's in the freezer, you'll save money and usually time too.

What are your favorite meals to freeze?

Jan 25, 2018

Getting Started with Freezer Cooking

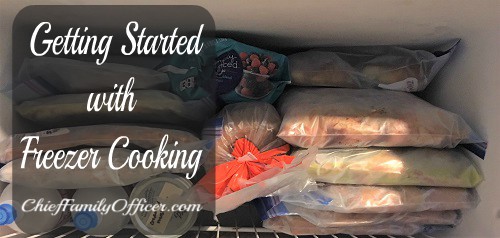
You don't need a lot to get started with freezer cooking. In this latest installment in our new freezer meals series, I'll share some ways to quickly build up your stash of freezer meals, as well as supplies that you might find handy. (Note: This post contains some affiliate links that help support this site at no additional cost to you. Thank you for using them! You can read CFO's full disclosure here.)

Getting Started with Freezer Cooking

How to Build a Stockpile of Freezer Meals

The easiest, fastest way to put some meals away in the freezer is to double or triple what you're already making. For example, I find assembling lasagna time-consuming and laborious, so I never make one at a time. I always make at least two, and if I have enough ingredients and pans, I'll make three. I'll bake one to eat right away, and freeze the other(s).

Another easy way to add to your freezer stash is to turn leftovers into a new meal, such as enchiladas. I always have some meat leftover when I make beef or chicken tacos, so I pull out some frozen tortillas, a can of refried beans, a pouch of enchilada sauce (this brand is our favorite), and some shredded cheese - all ingredients I almost always have on hand - and make a pan of enchiladas that I freeze for a future meal. I've heard some people have a "catch-all" container for leftovers in their freezer and when it's full, they make a pot of soup with the contents.

One way of acquiring meals that requires a little more work and planning, but also can be lots of fun, is to do a meal swap with friends. Everyone makes enough meals for everyone else to take home, so if there are five of you, you each get four meals plus the one you made yourself. I have been wanting to do this for a while now, and this series has inspired me to finally corral my friends into it!

Finally, the way I most often stockpile meals is a freezer meal prep session that lasts anywhere from a half hour to three hours, depending on what I'm making. This usually happens when I've bought a lot of meat at once, either from Costco or discounted at Ralphs or Target. For instance, I recently picked up four pounds of ground turkey at a great price, and made a meatloaf, bolognese sauce, turkey burgers, and chili, all of which went into the freezer. It's a little more time-consuming than the other ways discussed, but still faster than making each meal separately, since I'm chopping, cooking, and so on, all in one go.

Supplies to Help Make Freezer Meals

You don't need anything fancy to make freezer meals, but you do need some basic supplies so you can freeze the meals. Here are some things that will make it easy:
  • Baking pans - I have multiple ceramic and glass baking pans, but if that's too much of an investment for you, you could always go with foil pans. If you opt for foil, check out how Andrea Dekker stacks her pans in the freezer.

  • Plastic wrap - Stretch-tite is apparently the premier brand, and I get the giant rolls at Costco, which last me many months, if not a year or two. Good plastic wrap is important to prevent freezer burn and properly preserve your meals.

  • Aluminum foil - Foil is also important for properly storing your meals in the freezer. Heavy duty foil is nice (I order the large roll from Amazon), but not a requirement. FYI, I cover my pans with one layer of plastic wrap, then with a layer of foil.

  • Zip top bags - I'm not picky about brands, although I would go with name-brand bags since they tend to be thicker and therefore less likely to tear. I've actually been really impressed with the quality of the bags from IKEA.

  • Food storage bag holders - These are absolutely not a requirement but I have this Joakri set and love them. If you're freezing meals in zip top bags, the holders will definitely make your life easier.

  • Mason jars - These are great if you're freezing liquids, like soup, pasta sauce, or milk that's about to go bad. I highly recommend straight-sided jars like these because the liquid will slide out more easily if it's still partially frozen.

  • Sharpie - You need a good marker to write on the plastic bag, foil or container. Always list the contents and the date. You'd be surprised how hard it is to remember what something is after a month!

  • Masking tape - I like to put a piece of masking tape on my containers to write on so I don't write directly on the container itself. Masking tape always comes right off, and lasts forever. I've been doing this since I started making baby food almost 13 years ago, and I'm only on roll #2!
What have I forgotten, and what tips do you have for easily adding to your freezer meal stash?

Jan 11, 2018

Why I LOVE Freezer Meals (New Series)

A couple of years ago, I really began to understand freezer cooking, and it's dramatically changed my life. Freezer meals help me save time, money, and most especially, stress. So I want to show you how to incorporate freezer meals into your life with a new series of posts that will run every other week. I'll share recipes, techniques, and tips for making freezer meals a natural part of your life.

Freezer Meals Series

To start the series, I wanted to give a little background, because it's not like freezer meals are a new concept. Unfortunately for me, it got tangled up with the concept of once-a-month cooking, which I'd learned about first and never really worked for me. I think that's why it took me so long to figure out why freezer cooking is so wonderful.

Here's the difference: The idea behind once-a-month cooking is that you cook just once a month, freeze a bunch of meals, and then all you have to do for the month is defrost, heat up, and eat. By contrast, the idea behind freezer meals (at least as I use the term) is to do the prep work ahead of time, but not necessarily the cooking.

I really wanted to love once-a-month cooking but it never felt like a good fit. The food often didn't taste great because the meals just weren't the same once they had been frozen, a lot of the recommended meals were ones my family and I didn't like, and it may have required cooking only once a month, but that was one session that required a huge amount of planning and a giant chunk of time (like all day).

It was Kelly at New Leaf Wellness and her method of freezing slow cooker meals before cooking them that transformed my relationship with freezer meals.

For a while, I froze meals according to Kelly's recipes, but after a while, I got the hang of converting meals into freezer meals, and freezing parts of meals.

Now, I buy meat when there's a sale - I'm always looking for discount stickers at Target and Ralphs. Usually, the meat is discounted because it's the sell-by date. So later that day, I turn the meat into a freezer meal: ground meat becomes a meatloaf or chili, chicken thighs get cut up and marinated in a miso paste, chicken breasts get cut into bite size pieces to be breaded on the night I'm cooking them, etc.

Some meals are just assembled, ready to be baked. Some meals get dumped into a slow cooker and left alone all day. Some "meals" are just components that need to be assembled and cooked, requiring more work on my part - but much less work than if I had to do everything at once.

Because I'm cooking the food for the first time when it comes out of the freezer, it tastes fresh. I can make the meals when I have time and/or find a great sale and want to stock up on an ingredient like meat. Most of my family's favorite meals can be adapted to the freezer in some way, whether it's freezing the entire meal ahead of time or freezing components to speed things along.

Freezer meals also make meal planning super easy, because most of the meals are already made - I don't have to worry about what's on sale or whether I have to buy ingredients. Many of the meals can be made ahead of time so they work for my busy schedule. For example, I plan slow cooker meals for the nights the boys have practice, and the food needs to be ready the moment we walk in the door. Most nights, I cook enough for leftovers so my husband can brown bag a lunch the next day. Since he doesn't like taking messy foods like soup or pasta with tomato sauce, I save those meals for the weekends.

I hope I've converted you and made you as excited about freezer meals as I am! Stay tuned for more in this series, and let me know if you have any questions or if there's something specific you'd like to see addressed in an upcoming post.

Jan 5, 2016

Why I'm Cooking More in 2016 (It's not why you think)

My new countertop oven has me cooking up a storm! | Chief Family Officer

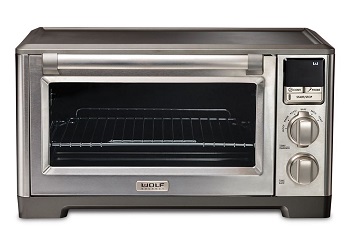
I freely admit that I'm spoiled by my parents (yes, even now), so I was only a little surprised and more than a little delighted when they said they would give me the one (very) expensive item on my wishlist last month: a Wolf Countertop Oven. (Thanks, Mom and Dad - you're the best!)

I had been wanting a countertop oven for several years, because (as I've mentioned several hundreds of times in my menu planning updates) I dread using my oven during the summer when my kitchen overheats. I read many reviews and the consensus was a Breville model.* The consensus was so universal that I almost pulled the trigger, but I wanted to see the oven in person - and when I did, I just felt it was only a hair bigger than my toaster oven and not worth the $250+ I would spend.

And then I read Michelle at Hummingbird High's review of her new Wolf countertop oven. She made two gorgeous pound cakes in it, which was a great indicator of its size. Michelle also graciously fielded some questions on Twitter from me, which confirmed that the Wolf oven was larger than a toaster oven - big enough to fit a 13x9 pan, in fact.

So this is my new favorite toy:
My new Wolf countertop oven has inspired me to cook more! | Chief Family Officer
Even though I still have my large gas oven, I've only used it once since I got my Wolf oven. That's primarily because my large oven is large - so it takes a long time to preheat, and I've always felt it was such a waste to use it if I wasn't cooking a lot of food at once. (And in fact, the one time I used the large oven was on Christmas Eve, when I made prime rib.)

Predictably, I'm baking a lot. Almost every day, in fact. But I'm also cooking more dinners because of my Wolf oven - so far I've made Beef Wellington, Cauliflower Gratin, and Baked Brie, just to name a few things. Tonight I'm making pizza, which I haven't made in a long time. The oven is large enough to fit my pizza stone, and I'm motivated to make some frozen pizzas for the future.

Now if I could just figure out how to use the convection setting properly (the one time I did, my cupcakes came out totally lopsided) ...

*This is an affiliate link - when you shop at Amazon after clicking through it, you help support this site at no additional cost to you. Thank you! You can read CFO's full disclosure here.

Aug 24, 2015

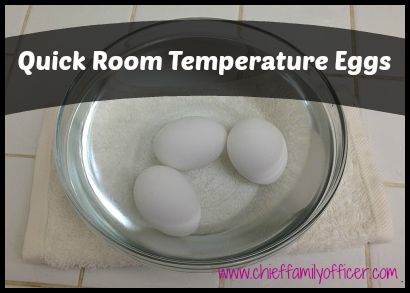
Quick Tip: Get Room Temperature Eggs Fast

How to Get Room Temperature Eggs Quickly

Sometimes recipes call for room temperature eggs. It happens mostly with dessert recipes, especially if they involve heating or beating the eggs. But sometimes you don't want to wait for the eggs to come to room temperature, and with this quick tip, you don't have to:

Put the eggs in hot water for a few minutes.

You do want to be careful not to make the water too hot, or your egg will cook in the shell. If you put the eggs in the hot water when you first start preparing a recipe, by the time you get to the eggs, they should be warm enough to use.

Previously: How to Quickly Soften Butter for Baking

Jan 31, 2015

This Week's Healthy Dish: Chard & Kale Pasta with Bacon + BonusWatermelon Radish

Cook a new healthy dish each week in 2015 - chieffamilyofficer.com

As I mentioned previously, I'm making one new healthy dish per week this year to help me conquer my fear/reluctance to try new foods and techniques.

This week I tackled chard, which came in my mid-week CSA box. I should have taken a before photo - it was listed as "assorted chard" but I'm pretty sure I ended up with run-of-the-mill Swiss chard. I'd intended to make Orecchiette with Sausage, Chard, and Parsnips but somehow managed not to buy the sausage or parsnips so I ended up tinkering with this Bon Appetit recipe for Bacon and Swiss Chard Pasta.

Chard and Kale Pasta

I had bacon on hand, as I usually do, and since I only had one bunch of chard, I added a bunch of Lacinato kale, which had also come in my CSA box. I sauteed the bacon until it was starting to get crispy, drained most of the grease, and added the chopped greens and some salt and pepper (not too much because the bacon is a bit salty and I knew I'd be adding Parmesan). Once the greens were soft, I added a splash of heavy cream, tossed the greens, and then added the cooked pasta. Of course, freshly grated Parmesan cheese is a necessity of life.

My kids mostly avoided the greens but ate the pasta itself, which actually counts as a victory around here (the older one ate the bacon too). Leftovers were delicious the next day for lunch, albeit sparse on pasta since the kids had eaten most of it. I'd say I'm as comfortable with chard now as I am with kale, and would gladly cook with it again.

Also in my CSA box were a couple of watermelon radishes, which are as pretty as they sound. They are also totally not bitter! I've been eating them sliced thinly and raw, with a little salty cheese.

On to next week's food adventure!

Image via FreeDigitalPhotos.net by KEKO64.

Jan 16, 2015

This Week's Healthy Dish: Quinoa Salad with Cucumber, Feta and Shrimp

Cook a new healthy dish each week in 2015 - chieffamilyofficer.com

As I mentioned previously, I'm making one new healthy dish per week this year to help me conquer my fear/reluctance to try new foods and techniques.

One of those is quinoa. Well, it was, because I made it on Monday and it was great! I've actually had quinoa before, but I've just never liked it. Maybe it just wasn't cooked well or something, because I was quite pleased with how it came out. I used one cup of uncooked quinoa, 3/4 cup of low-sodium chicken stock, and 1 cup of water. I combined them in a small saucepan, brought the mixture to a boil, and then left it to simmer for approximately 20 minutes. To be honest, I forgot about it until I smelled a slightly nutty odor and ran into the kitchen in a panic, convinced that I'd just burned the quinoa! But it was perfect - perfectly fluffy, that is.

I then made this quinoa salad, although I skipped the carrot and added some sauteed shrimp. I sliced the cucumber pretty thin, and the salt from the feta pickled it slightly and gave it a marvelous crunch. I also added some Meyer lemon zest and lemon juice, since I wanted some acid to brighten the flavors.

Quinoa Salad with Cucumber, Feta and Shrimp - chieffamilyofficer.com

I will definitely make this salad again, and am on the hunt for other quinoa recipes to try.

Image via FreeDigitalPhotos.net by KEKO64.

Jan 9, 2015

New Cooking Strategy in 2015: A new, healthy dish each week

Cook a new healthy dish each week in 2015 - chieffamilyofficer.com

I've learned a lot about establishing new habits from James Clear, so instead of thinking in terms of goals and resolutions this year, I'm focused on changes and habits, and especially on changing habits.

One change that I want to make this year is better eating habits - especially eating more produce and reducing my sugar consumption. However, I've noticed that I shy away from unfamiliar ingredients, or ingredients I've struggled with in the past even though they are supposed to be healthy.

A good example is quinoa. I've never really liked quinoa, whether I've had it at a restaurant or made it myself. But a lot of people do like it and it's healthy, and I've got a whole bag that I got for free at Ralphs sitting in my pantry. I've also got a bunch of beets from my CSA - I love eating them, but I've always been afraid to cook them. And, I just came across a recipe for Oven-Roasted Tofu, which is a way of eating tofu I'd never thought of.

That got me thinking: Each week, I can plan to make a new "healthy" dish that makes me uncomfortable - whether it's because of the ingredients and/or techniques, I will stretch my cooking abilities and knowledge, which is always a good thing, and my family and I can explore new foods. I know we may not like many of them (there's always cereal to fall back on!), but I'm confident we'll also discover some new favorites that will move out of the "uncomfortable" zone and into regular rotation.

If you have beloved recipes for alternate grains, please leave them in the comments! Just keep in mind that we are a nut-free and seed-free house due to allergies (the only exception is sesame, for some odd reason). I'll keep you updated in my weekly menu plans as to which recipes we are trying, and what we think of them.

Spoiler alert: Since the beets are perishable, they'll be the first new thing I try!

Image via FreeDigitalPhotos.net by KEKO64.

Oct 23, 2014

Chief Family Officer's Favorite Things: Progressive Chop Turner

This post contains affiliate links that help support this site at no additional cost to you. Thank you for using them! You can read CFO's full disclosure here.


Over ten years ago, when I first began cooking for my husband, one of the first things I learned was that he likes his ground meat to be as miniscule as possible. We have a wooden spoon that curves into a point on one side, much like this OXO Wooden Corner Spoon:


It was our utensil of choice to mash ground beef and turkey as it cooked, but the cooking process required a lot of intensive attention - time that I could (and preferred to) spend on other meal prep tasks while the meat cooked. Still, I love my husband and I want him to enjoy his food, so I did my best to get the ground meat as small as possible.

Then, one day, I received a promotional pack for some product. The box included the item I was supposed to promote {I honestly don't even remember what it was anymore}, as well as various kitchen items, including the Progressive Chop Turner:


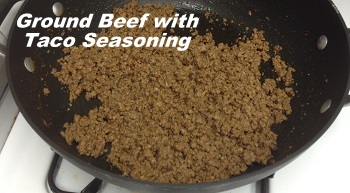
It's really odd-looking, and I didn't know what to make of it. I'm not even sure why I decided to use it, but I'm so glad I did! More than any utensil I've ever used, it gets my ground meat down to uniformly small pieces:

ground meat using the Progressive Chop Turner

It's hard to make out each individual lump of meat because of the uniform color, but that's now how all of my ground meat comes out looking if the recipe calls for crumbling it - tiny! And the best part is that I don't need to stand over the stove while the meat is cooking. I can wander away for a few minutes to do something else, then come back, vigorously stab and turn the meat a few times, then leave again. (Yes, I get to work off some angst too!) I repeat the process for as long as it takes the meat to cook, and by then, I've accomplished quite a few other tasks around the kitchen too.

Not long after my husband and I got together, I discovered that one of my friends likes her meat the same way {I learned this because she pulled out a lunch from home one day, and I gawked at how perfectly small and uniform her ground turkey was}. So for perfectionists and picky eaters alike, I highly recommend the Progressive Chop Turner!

You can buy the Progressive Chop Turner for $7.99 at Amazon. If it's unavailable, Oxo makes its own oddly shaped chopper.

See all of Chief Family Officer's Favorite Things here.